Articles
Feb 2009 — Installing a new top on a 1966 Martin D-35
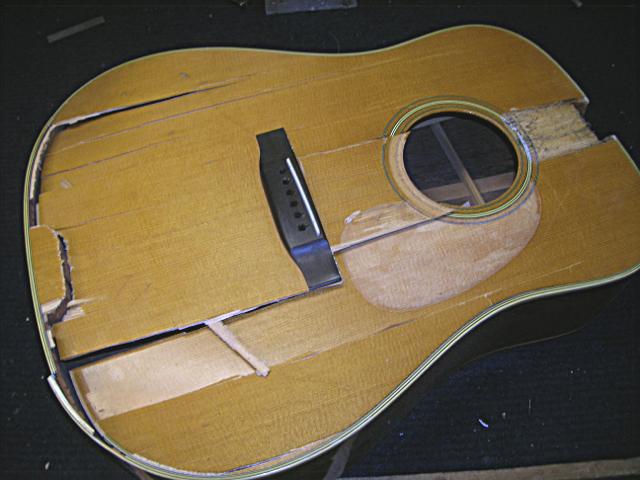 This fine 60s Martin dreadnought met an unfortunate fate one evening when it’s owner tripped while carrying the guitar. The guitar was dropped on the floor in front of the owner who then fell directly on top of the guitar, badly shattering the top when his elbows (and the guitar) broke his fall. As you can see, the guitar top suffered serious damage in the fall. Not only was the top cracked along it’s grain but it was completely
 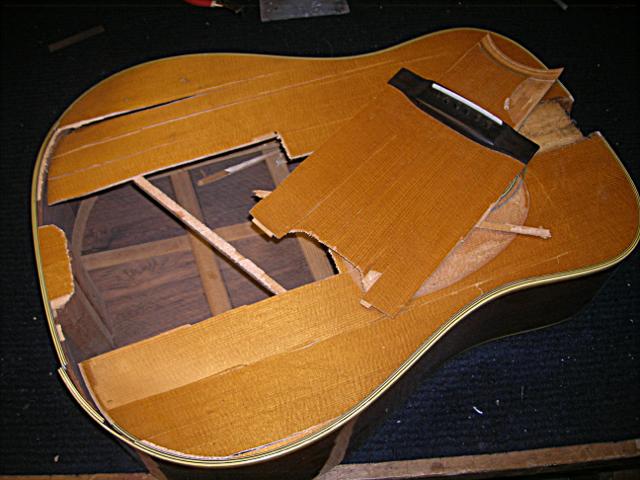 broken across the grain at the tail block. While longitudinal grain cracks are easy to repair cross grain damage is not so simple. In addition to the top damage there was catastrophic damage to the top bracing as well. Luckily, the back and sides suffered little damage. In most cases my approach would be to attempt to save the original top, but this top suffered far too much damage to be saved and in such a case complete replacement is the best option.
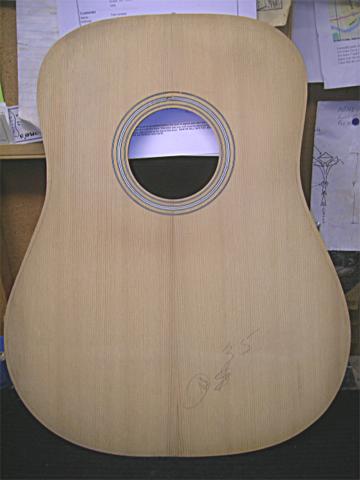 The top chosen for this guitar is a new, old stock factory top that is from the same period as the guitar. The top was obtained in a large
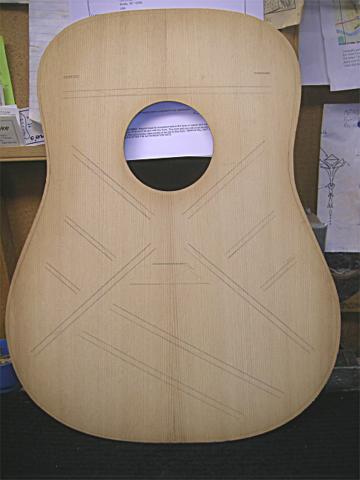 purchase of old Martin parts that I made in the late 90s. The guy Igot the parts from was a hobby guitarmaker in the Nazareth PA areawho had literal closets full of old Martin parts. Using a new Martin top would not have allowed for a perfect rosette match with the old top, as the gauging of the rosette lines has changed since the 60s. Icould have made up a new top and installed a rosette in my shop that would have matched the 60s pattern, but installing a new old stock top allows theguitar to truly be put back to as close to“original” as possible. The bracing pattern markedon the top is original from
 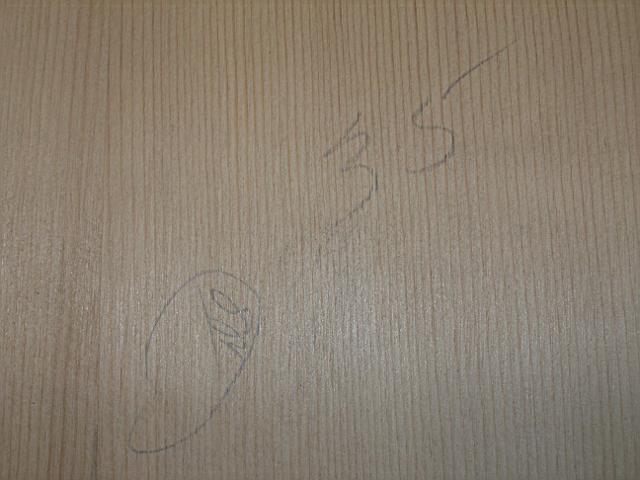 the factory, and the marking on the outside face shows that this top was originally intended for a D-35, so it’s the perfect part for this job.
The first task of this job was to remove the top. First, the top binding was removed using heat from a hair dryer. The hot air was used to heat small sections of the binding to soften the glue 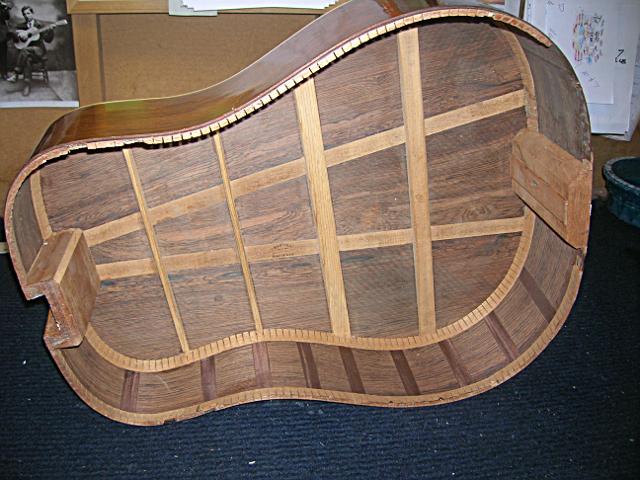 to break the bond. I chose this method rather than just tearing the binding off with the top because I wanted to save the binding to re-install after the top replacement was done. If new bindingwere installed there would be color matching issues with the old back binding that would need to be dealt with. Re-using the old binding, while requiring great care,
 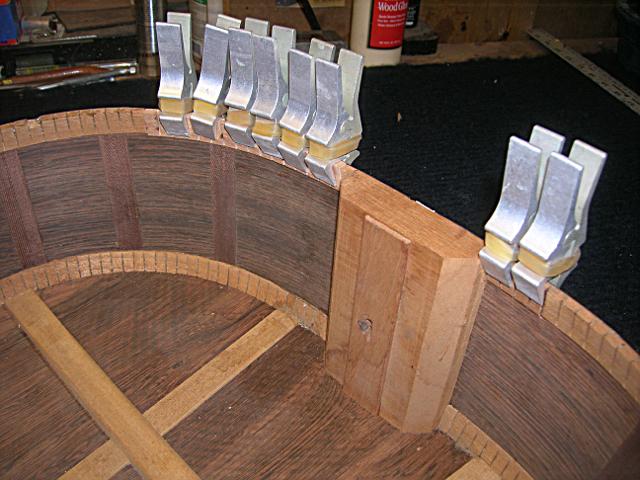 provides the most seamless appearance on the finished job as the binding color will be perfect. Once the binding wasremoved the top was carefully removed from the glue block lining. Heat was again used to warm the top and lining in small sections. The exposed joint edge of the top and lining (exposed by removal of the binding) allowed for a thin probe to be slipped into the softened glue joint and bit by bit the top is separated from the body. There had been a small amount of damage to some of the glue block lining in the fall, down near the end block where the damage was the most severe. Fresh kerfed lining was installed to provide gluing surface where the old damaged lining was removed.
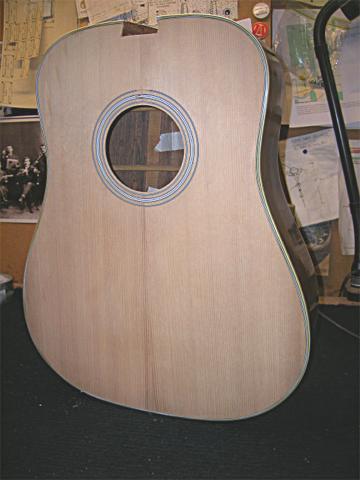
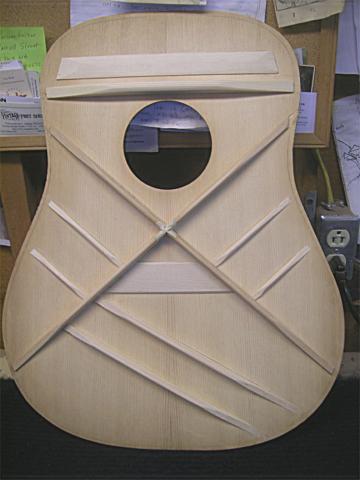 Next the top was braced using the appropriate 1960s pattern and gauge of bracing. The D-35 used ¼” gauge top bracing that was straight for most of it’s length (not scalloped) and tapered in the final few inches. The pic shows the top after the bracing was glued in place, shaped and sanded, the top ready to glue onto the body.
 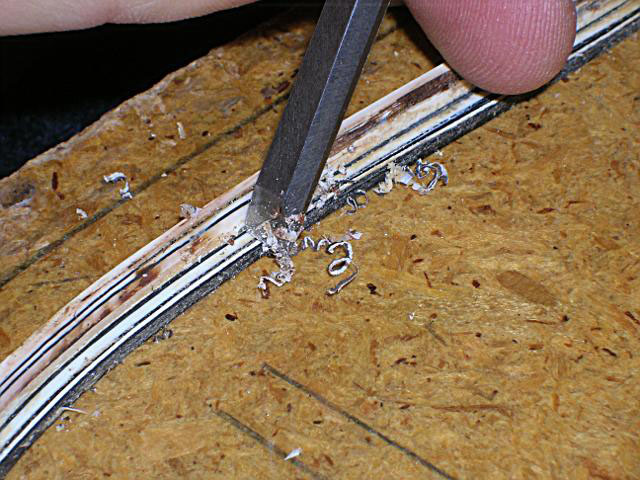 Before gluing the top to the body I took the time to prepare the oldbinding, which was removed in a single strip with purfling attached, to be reglued to the body. There was a good deal of spruce and cedar fibers stuck to the underside from the top and lining and all of that needed to be removed to provide a good flush surface for fitting andgluing to the body. Using a sharp chisel as a scraper, I cleaned the binding all the way around, removing all of the fibers from both surfaces that would contact the body.
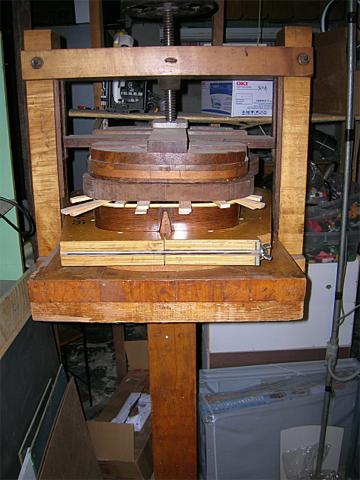 The top was then glued to the body using a body press. The press used in this operation is from the 1930s and came out of the Martin factory. To accomplish this task a platen matching the curvature of the top is placed on the table of the press. The top is placed on the platen. Then, the body (which is now held in a building form) has
 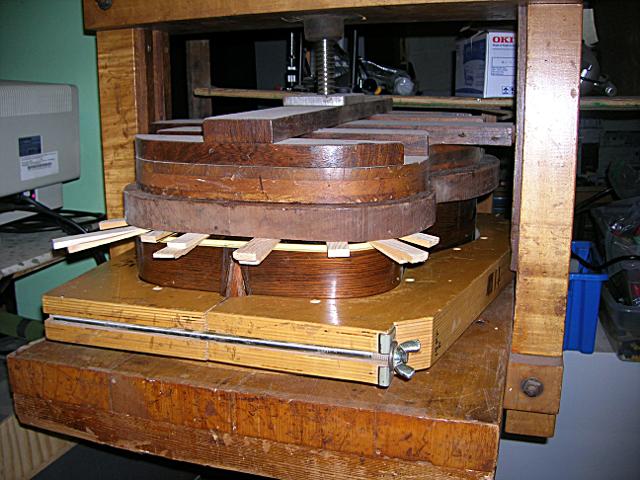 glue applied to the lining and is then placed on the top in properposition for clamping. A curved back board is used to clamp against the radius of the back and the entire sandwich of top platen, top, body, and back platen are clamped by applying pressure with the floating press platen that lowers from above. This arrangement allows for even pressure all the way around the body. If there are areas that seem to need a little more pressure this is accomplished by inserting wooden wedges along the back platen to distribute clamping pressure.
The body was left in the press overnight and after drying was removed to have the binding 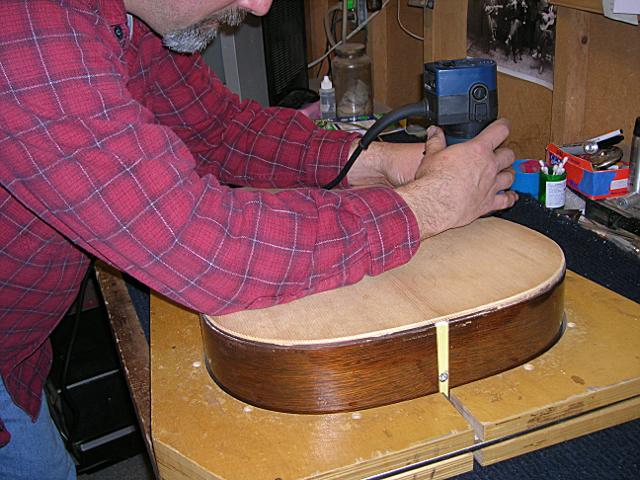 channel routed. I carefully checked the depth of the binding and purfling channel on the sides of the guitar for accuracy. As the original channel was not disturbed and neither was the original lining, the depth was correct all the way around. All that needed to be done was that the channel for the purfling against the top needed to be cut. For this I used a laminate trimmer and an LMI purfling cutter bit and bushing. The bearing on the bit left a little bit of impression on the finish of the sides but as it is my intent to overspray the sides this was not a major concern. Once the binding channel was cleaned up a bit (using mainly a single sharp chisel and several small files) the original binding was re-installed on the top.
 The final pics show the guitar body with the new (old) top with the old binding installed, ready to go to finish. As the top is old it has theright rosette and more importantly, 40 year old
  oxidized color that will make the retop virtually undetectable from the outside (the top is signed on the underside so it could not be passed off as original). The original binding color matches the old back binding well, making saving that old binding very worthwhile.The guitar is currently (as of this writing, Feb ’09) having the finish work done with light aging toner on the top to complete the job. I will update this article with complete “after” pics once the finish work is done and the neck is back on the guitar.
UPDATE:
 The finish work on this guitar was completed in February and by mid March the guitar was back in the hands of its owner. The entire guitar was given a
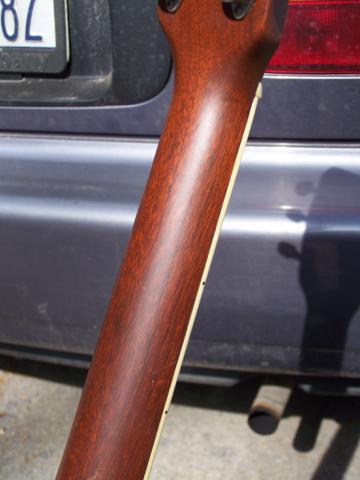
 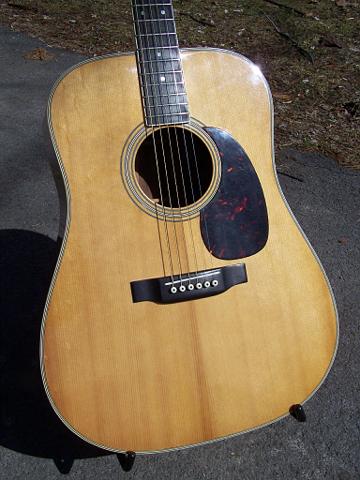 light lacquer overspray to freshen the look of the back and sides to match the new finish on the top. In addition, this guitar had a neck break that went from the back of the nut up to nearly the 4th fret with the shaft completely broken off. This break was glued back together in my shop and an absolutely masterful finish touch up was done by Dale Bartholomew, who also did the body finish work. Dale is retired from the Martin finishing department where he worked starting in the mid-1960s until retiring several years ago. Dale operates a finish shop of his own now and is an ace at working with lacquer. He deserves at least half the credit for how great this guitar looks today.
 Upon receiving the guitar the owner called to indicate how pleased he was with the top replacement and neck repair. The owner’s son, who handled shipping the guitar to me an was my contact during the repair, wrote to me in email:
“My Dad just received the D-35 safe and sound. He called me right away and rambled for a good 15 minutes straight about the incredible job you did. He was 100% satisfied with the old piece of Martin Spruce you chose to use for the top, and he actually couldn't believe the neck was ever broken. You should probably expect a phone call from him some time this weekend.”
I did hear from the owner directly that weekend and he expressed his satisfaction directly. It’s always good to hear from a happy customer!